产品
FIB-SEM
Nanomanipulators
OmniProbeOmniProbe Cryo软件
AZtec3DAZtecFeatureAZtec LayerProbeTEM
Hardware
EDSUltim MaxXploreImaging
软件
AZtecTEM
2nd May 2019 | Author: Dr Matthew Hiscock
Automated Feature analysis is a powerful tool that automates a process which we normally perform manually.
That process is:
When we only want to investigate a few features then that manual approach is fine, but if we want to analyse hundreds or thousands of features then an automated approach is necessary.
One of the key parts of automated feature analysis is the first step – determining where the feature is. This is something that the human eye is very good at – you can see the difference between a feature and the material it is mounted on easily. In AZtecFeature our standard approach is to identify where a feature is from using an electron image collected with the SEM using grey level thresholds.
We often use backscattered electron (BSE) images for identifying features as the contrast in these images relates to the mean atomic Z number of the elements under the beam. This is very useful as it means that we can compositionally “see” where one feature ends and another one starts.
If a group of pixels are brighter or darker than other ones which surround them then it is possible for us to identify that group as a feature – we simply say that if the grey level of those pixels falls within a certain range then they form a feature and should be have their morphology measured and have EDS acquired from them.
So how do we set up a threshold? It’s actually a very simple process.

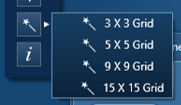
The easiest way to set thresholds is using our magic wand thresholding tool. With this you simply click on features in the image and thresholds will be created! When we do this, we’re looking for all the grey levels in the little grid at the end of the cursor which you can see in the image below.

By building up multiple thresholds you can very quickly identify particles from the background they are mounted on but also identify sub-particles or grains within larger particles. You can see an example of this in action in the video below.
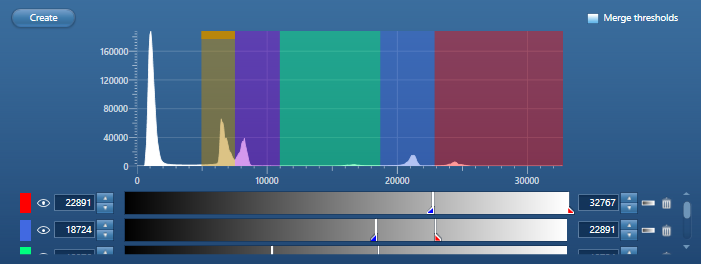
You also have a couple of other options available to you to create thresholds. The first option is that you can simply click “Create” at the top left of the thresholding box – this will make a threshold in the middle of the available range which you can edit yourself.
The other approach you can use is to hold down shift and drag across the histogram which you can see in the image below. This histogram shows the numbers of pixels at different grey levels. It can be very useful if you have a population of particles of different types with different grey levels as each different particle type will show up as a different peak on the histogram. By drawing your thresholds on to the histogram you know you a separately identifying the different particle types – the image below shows an example of this.

I really hope that this helps you with your thresholding – it really is the key to a good feature analysis.
If you have any questions, don’t hesitate to speak to one of our experts – I’ll be back for another AZtecFeature tips and tricks blog in the coming months!
We send out monthly newsletters keeping you up to date with our latest developments such as webinars, new application notes and product updates.
 公安机关备案号31010402003473